


About Digital Soil Testers
I originally wrote this post last November. The weather’s been so hot I thought it was a good time to put it out there. Hopefully it’s helpful as we work our way through this record heat wave.

I’ve been reading about different techniques for figuring out if your plants are getting enough water. The subject is important because I’ve killed any number of plants where the death blow seems to have been delivered by too much water, or perhaps, not enough water. If you wade through the content of these articles, you find that the symptoms of overwatering and underwatering your plants are depressingly similar. Overwatered plant leaves and stems become floppy and droopy, and the base of the plant stem begins to feel mushy or unstable. The leaves turn brown and wilt, and the plant has stunted, slow, growth. On the other hand, symptoms of underwatering can look disturbingly similar. Underwatered plants also have drooping leaves. They have browning and curling leaves, and they suffer from slow growth. As a veteran observer of many plants that have drooping, mushy, curly, brown, wilted, slow-growing leaves and stems, I often find myself confused by this overwatering/underwatering conundrum.
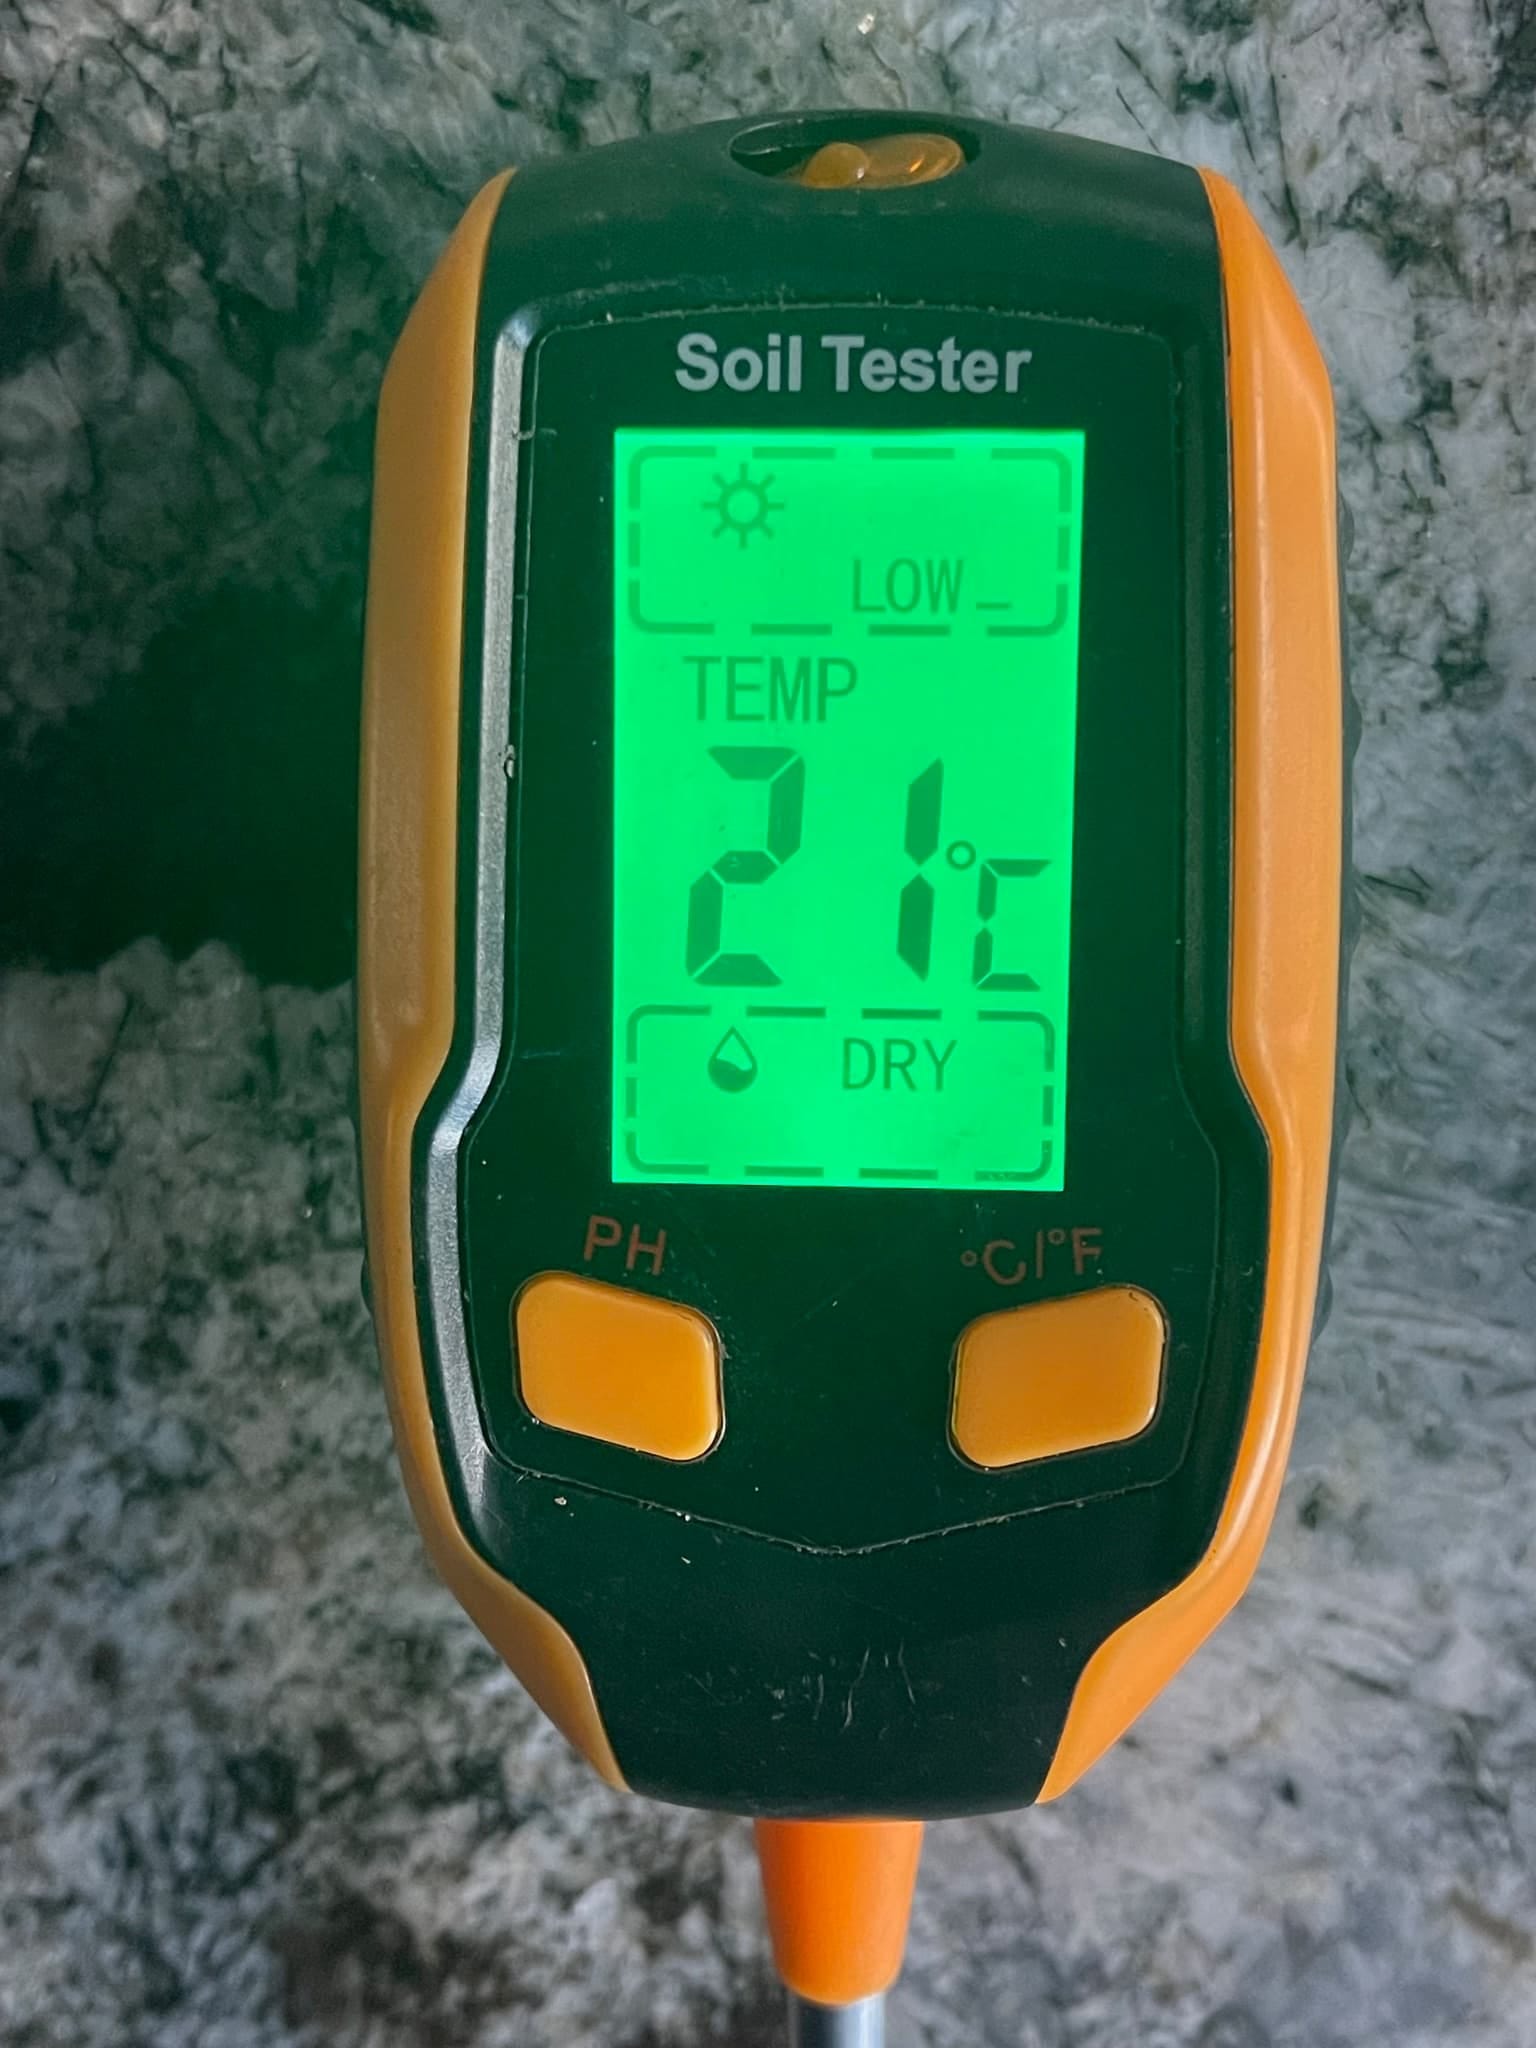
I realized that this lack of information about properly watering my plants is ridiculous, and decided that the answer, like many things in our modern life, probably resides in the latest technology. A quick search reveals any number of digital gauges that can measure water in the soil, as well as sunlight, soil pH, and soil temperature. I purchased a digital soil tester on Amazon for less than $30, and immediately set about testing the soil in all of the beds to see if they were too dry or too wet. To my great surprise, almost all of my beds measured too wet. This result occurred even though it hadn’t rained in several weeks. Getting this consistent “too wet” reading made me distrust the soil tester, and I spent several hours reading about how they work, wondering if the tester itself was screwing up the results. Many variables could impact the results. One problem might be that you are required to put the metal probe of the tester four to six inches into the soil, and in many places there is so much clay that I’m not sure if the tester was deep enough to get an accurate reading. Another potential problem is all of the beds have been mulched, and I worried that I wasn’t reading the moisture in the soil, but the mulch instead. The mulch is there to retain water for the plants and keep the soil wet, so it seemed logical that I might get a distorted reading, even though I tried to carefully scrape the mulch away from the soil tester.
While I was out in the garden testing the soil for moisture, I thought I would also test for pH, since the digital tester shows the pH reading at the same time as the water reading. The pH reflects alkalinity or acidity in the soil. The scale goes from one to 14, where seven is neutral. The results of these tests were also quite surprising, because I thought most of my beds would test to have neutral pH, or perhaps be slightly acidic. Not so. The Back Bed and the Astilbe Bed, which are next to each other against the back of the house, both measured neutral pH or close to it, with numbers hanging around 5 or above. From what I’ve read, the perfect pH is about 7, but 5 or higher is “in the range” of neutral, which means the soil will allow the plants to absorb nutrients through their roots. I was shocked to see that the Ostrich Fern Bed, which is next to the Astilbe Bed against the back of the house, tested to pH levels between 3.3 and 3.5, which seemed very low. Another mystery was why would the ostrich ferns, Jack Frost brunnera, coral bells, and variegated liriope thrive in soil so acidic? I didn’t know, but it sure raised the suspicion that something was wrong with the test. I got other suspicious pH readings in other beds around the house.
Adding lime to your soil is the most common method to correct having “sour soil,” or soil that is too acidic. You would think the solution would be easy -- just add lime. But for me, it isn’t so simple. There are three complicating factors in using lime. First, my beds are already planted and are pretty crowded with plant material, making it difficult to spread the lime. Second, my beds are mulched, making it difficult to get to the soil underneath. And third, the soil is mostly clay, which makes it more difficult to amend the soil with lime. I spoke with Robin, an associate at Sun Nurseries, who cautioned me about adding lime to my perennial beds. She wanted to know if the plants were thriving despite the pH readings. (In some cases, yes.) Did I do the soil test by pushing the probe through the mulch, or did I clear the mulch away before putting the probe in the soil? (I tried to clear the mulch.) Have I considered that I would do more harm than good by putting down lime? (Yes.) Have I considered that many shade plants actually thrive in acidic soil? (No.) The result was I purchased a bag of lime for $8 and drove home even more confused than I was before.
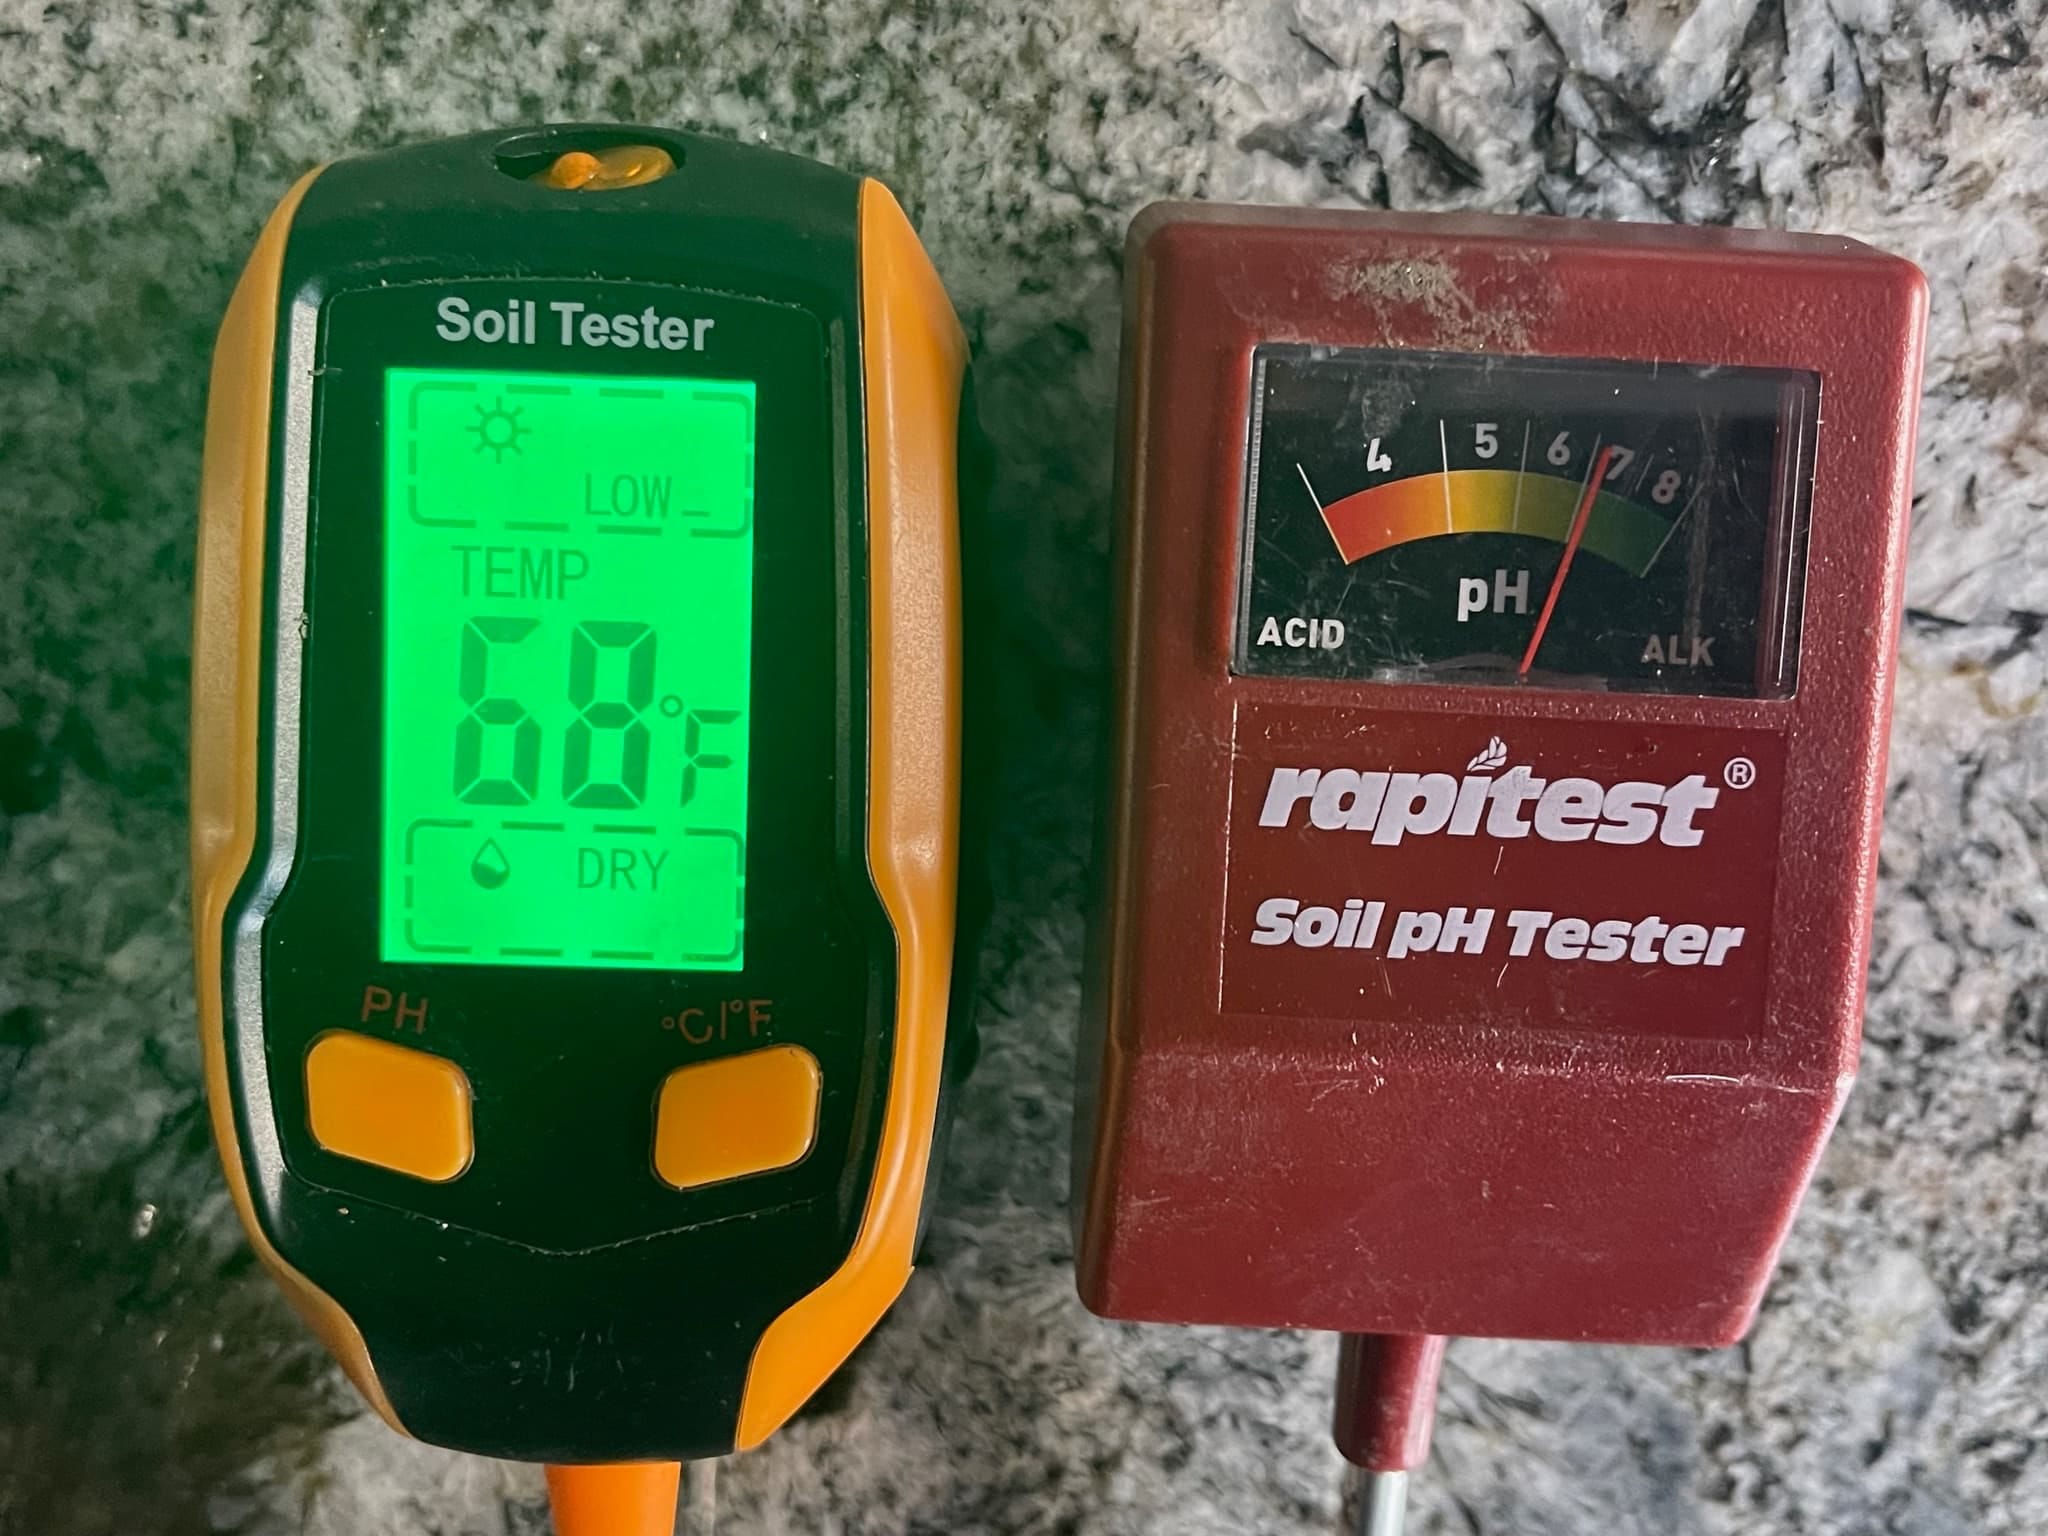
On the drive home I remembered that I had tested for pH early in spring with an inexpensive Rapitest© pH analog tester and the results were so boringly good that I forgot all about it. When I got home from the nursery I retested the soil using both the digital and the analog pH analyzers and, you guessed it, I got wildly different results. Where the digital tester showed the soil to be extremely acidic, the analog tester showed the soil to be neutral. The difference between a pH of 4 and a pH of 6.5 is so huge that the only conclusion was that one of the testers was giving a false result. To find out which tester was correct I decided to send a soil sample to an independent lab and let them analyze it for me.
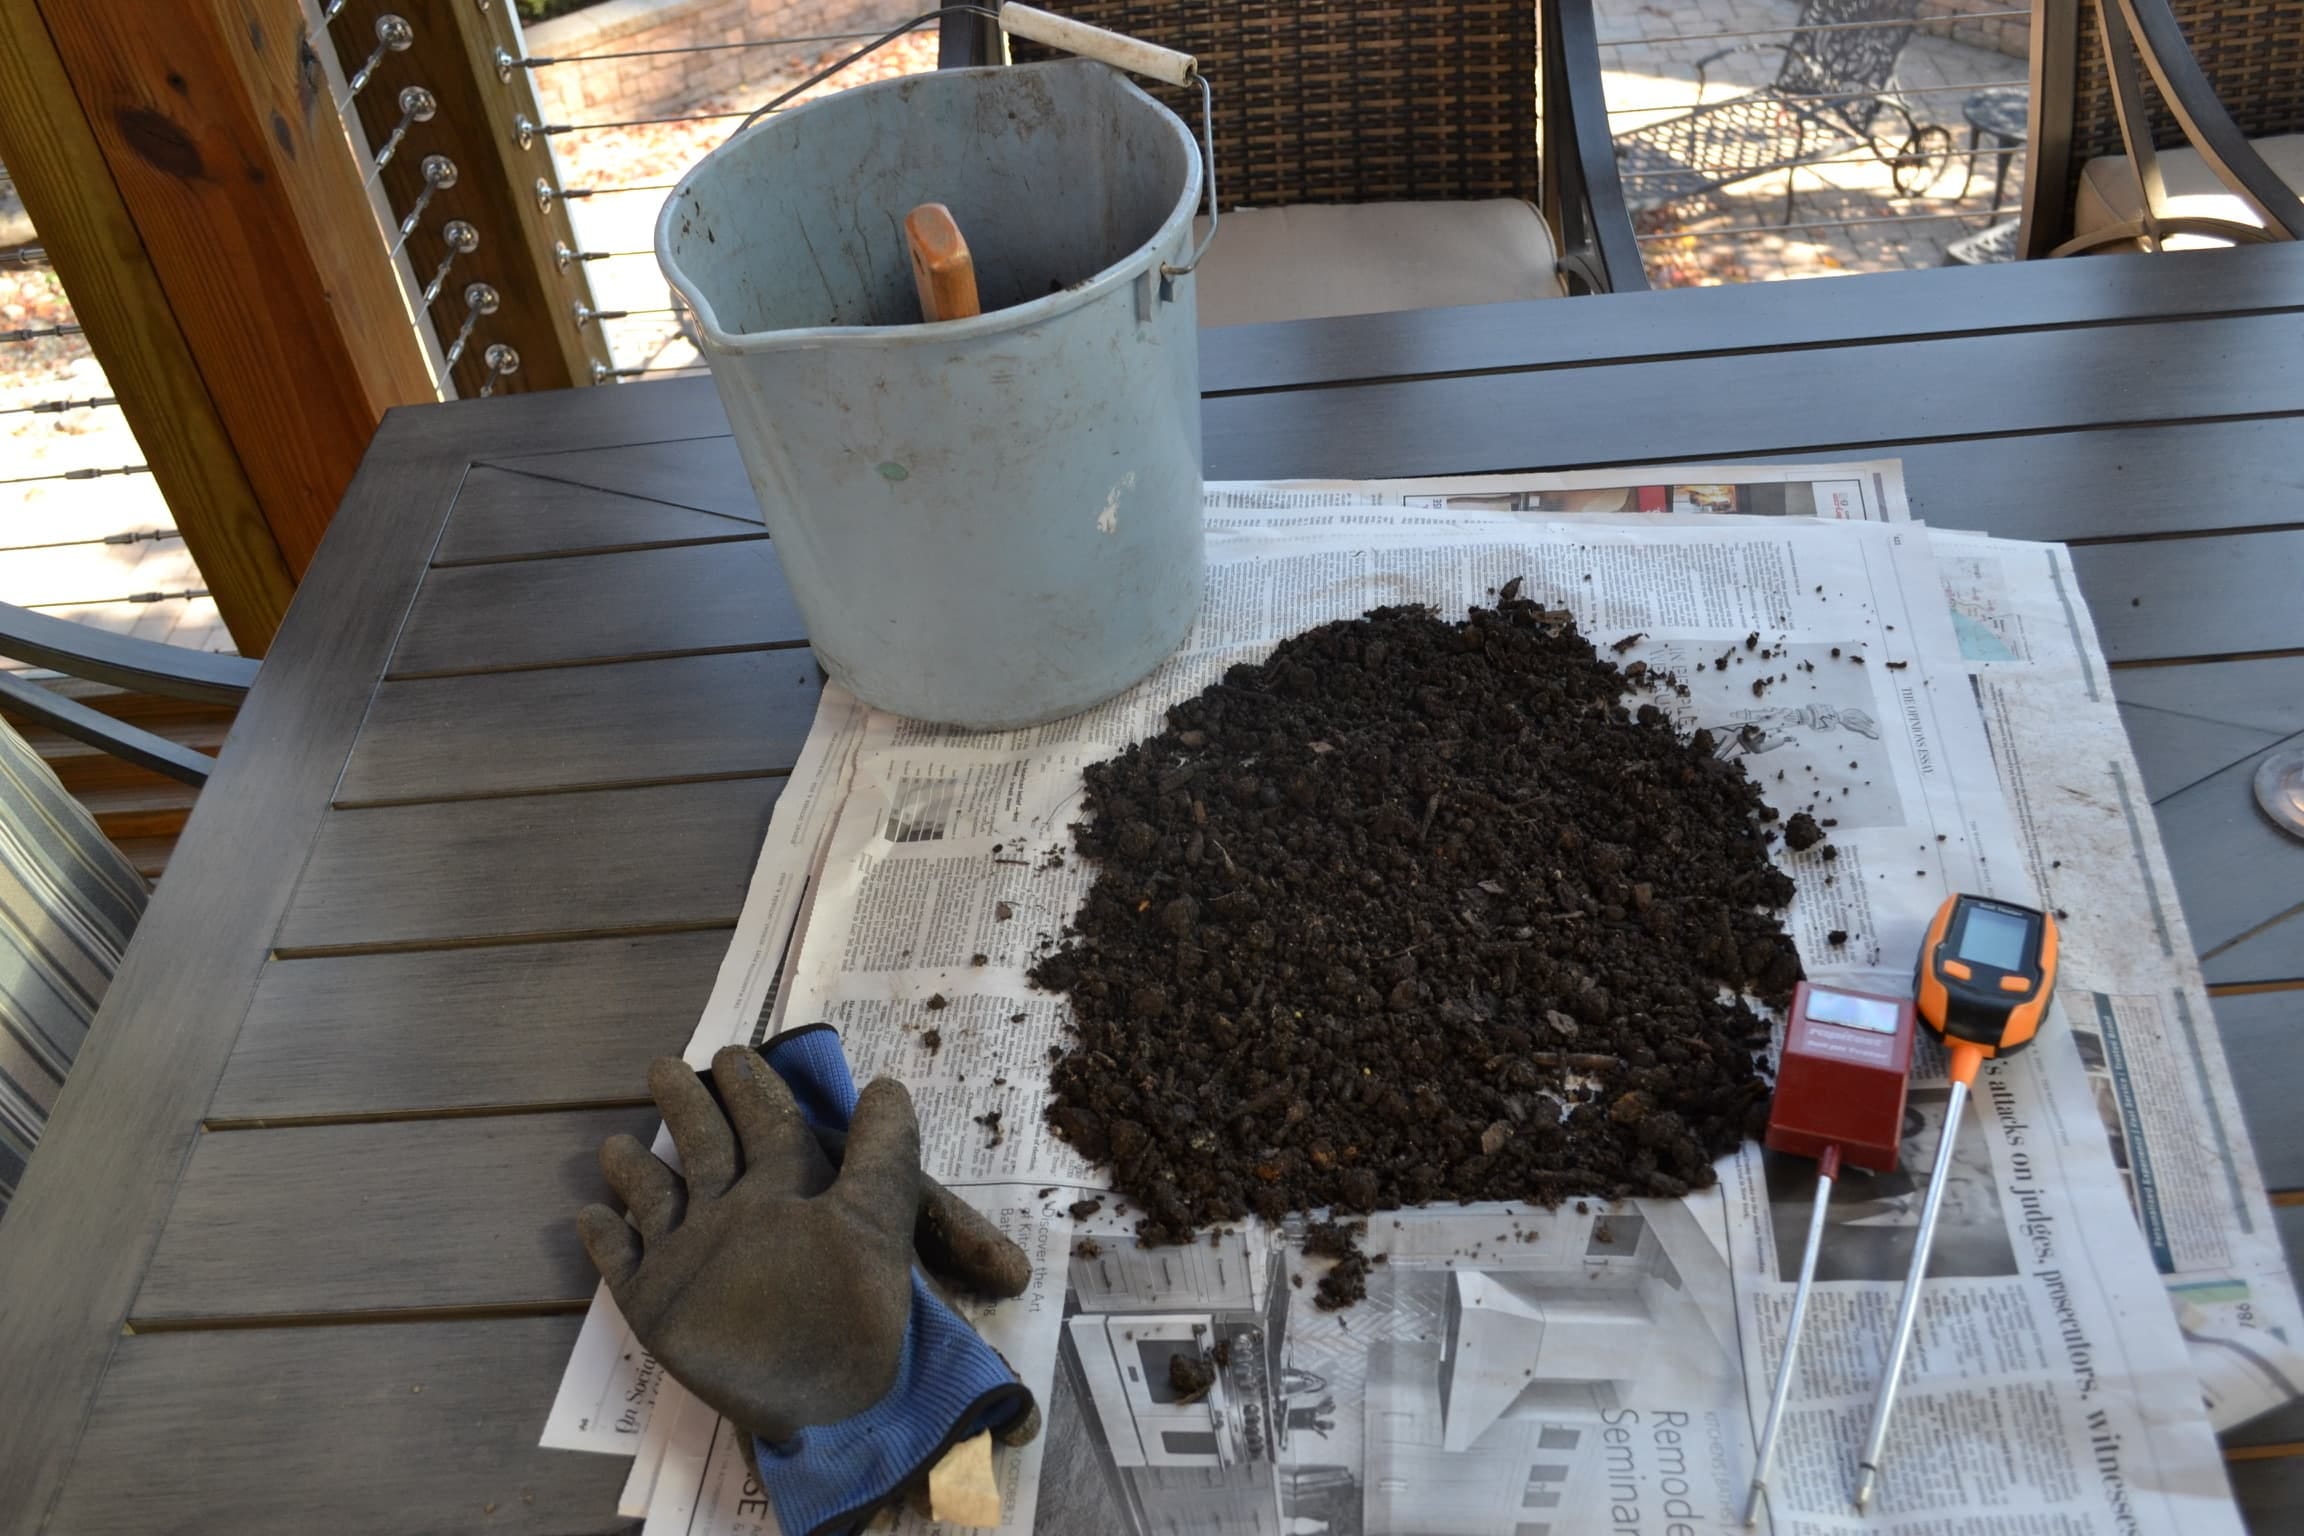
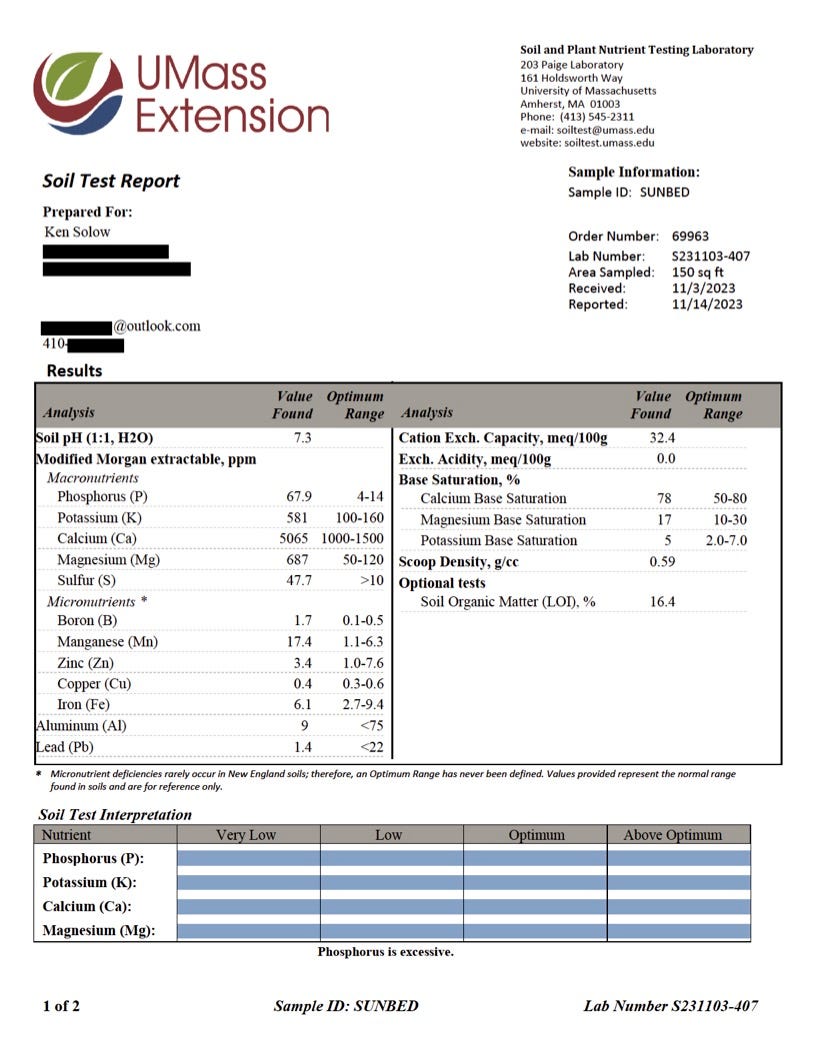
In my case, here in the state of Maryland, the University of Maryland no longer does soil tests for the public. The nursery recommended the UMass Soil and Plant Nutrient Testing service. I chose to take some soil samples from the Sun Bed, because it consistently showed the soil to have low pH with the digital tester and to have normal pH with the analog tester. I am pleased to announce that the tests came back quickly and cleared things up very nicely. The pH was 7.3. I think that’s just about perfect. Apparently I wasted my money on the digital tester. And no, I have no idea what the rest of this report means.
For those of you keeping score, the total cost of figuring out if I overwatered my plants, and if my soil had the correct pH, was as follows: $9 for the analog soil tester, $28 for the digital soil tester, $8 for a bag of pelletized lime, $26 for a soil test from UMass, $2 for a bubble wrap mailer, and $5.55 for postage, for a grand total of $78.55. Cost of sticking your finger in the ground, $00.00.
So far, at least, buying the digital soil tester resulted in more than the usual amount of confusion about matters that should be simple to solve with the help of modern technology. The only thing that is accurately measurable is the cost. Welcome, once again, to the painful education of a Type A gardener.
Thanks for sticking with me this long in a post that is a little longer than usual. Next week I think we will explore the notion that there is no such thing as a bed that is too crowded with plant material. We will enter the world of chaos gardening which should be a lot of fun. If you feel compelled to do so, why not share this post with other gardeners, or non-gardeners you many know? Just click on the share button. You might also want to check out some of the content in the archives.